Inspection & Repairs for 5 Common Symptoms of a Faulty CV Joint
Constant Velocity joints (CV joints) are an important component of your vehicle's system that aids in the transfer of power from your transmission system to your vehicle's wheels. These sets of joints allow you to easily control your wheels with the steering wheels.
As you can see, this component is critical to your vehicle's suspension system. This is why it is critical to be familiar with the symptoms of a bad CV joint to take the necessary precautions on time.
CV joints can be found in any vehicle model or type, though their location varies. The CV joints are protected by an outer and inner joint, as well as a rubber boot. A faulty CV joint can be extremely dangerous, particularly if it is not detected early. When your car is in for a scheduled car service in Reading, you will be educated on the symptoms of a failing CV joint or you can consult your mechanic.
5 Symptoms of a Bad CV Joint
The following are the five most common symptoms of a bad CV joint. Please take your vehicle to a mechanic if you notice any of the following symptoms:
1. Vibrations While Driving
Because many faults can cause vibrations in your CV axle while driving, narrowing down the source of vibrations in your CV axle while driving to a faulty CV joint can be very stressful. If you experience severe vibrations while accelerating, it could be the result of a faulty CV joint or your entire CV axle. As a result, if you notice vibrations in your vehicle, you should look for full car service near me online and have it checked because whatever the cause is, it can't be good. Furthermore, experiencing vibrations in your vehicle while driving makes maintaining control of your vehicle is much more difficult, which is extremely dangerous.
2. Grease On The Tyre Edges
As your vehicle's CV axle joints spin while driving, some grease accumulates in the boots. These boots prevent grease leaks. As a result, if you notice grease on the edges of your vehicle's tyres, especially if it comes from a minor crack, you may have a faulty CV joint. You must have this looked at as soon as possible to prevent further damage to your vehicle. If the grease escaping from your wheel is a dark colour, your vehicle's CV joint has most likely been damaged due to a lack of lubrication. However, before you begin any repairs, make sure you know what's causing the problem.
3. Knocking Sound
A growling or knocking sound does not always mean that your vehicle's CV joint is damaged. Numerous faults can occur in your vehicle and cause knocking noises while driving. As a result, you must have your vehicle inspected by a mechanic. If you don't have a regular mechanic, it's best to look online for a car service near me and take it to a reputable garage. However, one of the major flaws to consider that could be causing this issue is a faulty CV joint. A worn-out or faulty CV joint causes the axle system of your vehicle to wobble, resulting in growling or knocking sounds. The noise in front wheel drive (FWD) vehicles can come from the inner joints, whereas it can come from any section of the joints in RWD vehicles. Your differential can also produce these types of sounds. If the sound becomes louder, you should have it checked out immediately, or you can contact us for help. We will be able to pinpoint the source of the problem and resolve it as soon as possible after performing a diagnostic on your vehicle. You can diagnose this problem by accelerating and decelerating in reverse; if you hear loud growling sounds, your CV joint or axle is faulty.
4. Noises Produced When Turning Your Steering Wheels
Steering noises produced when turning your vehicle's wheels can indicate that your CV joints are damaged. It is not normal for your car to make noises when you are driving and attempting to make a turn. As a result, your vehicle must be inspected. If your CV joints are damaged, you must replace them immediately.
5. Vehicle Bounces While Driving
If your vehicle bounces or jumps while driving on uneven pavement or even smooth roads, your CV joints are probably faulty. Your CV joints also contribute to the absence of vibration while driving. You must, however, confirm the cause.
If you ignore any of these warning signs, the consequences can be costly to your vehicle.
How to Inspect a Faulty CV Joint
Examine the rubber boots on the axle shaft next to the wheel to identify a bad CV joint. The CV joint is most likely faulty if there is a tear or if it is covered in grease.
Move back and forward in a straight but smooth line, noting any shuddering in the axles and listening for any clunking sound. Again, if there is grease on the inside or outside edges of the tyres, a faulty joint could be to blame.
When inspecting a faulty CV joint, another thing to look for is vibration while driving. A faulty CV joint could be the cause of your vehicle abruptly stopping while driving.
This is achieved by turning the steering wheel completely to one side and slowly accelerating in a circle. Rep this procedure several times, keeping an ear out for any snapping sounds that indicate a bad joint. When you turn, a cloud clicks to indicate it. This is also one of the most noticeable and prevalent signs.
When CV joints wear out, they become extremely loose and emit clicking sounds when turned. Furthermore, CV joints are checked for cracks, rips, tears, and punctures that allow grease to leak out and dirt to enter. Examine the clamps for any that are loose or missing.
Inspect the CV joint by shifting into reverse, turning the steering wheel to one side, and driving backwards in a circle. You should look for loosened joints. The car will make a clicking sound when turning left or right.
Constant grease leakage from your vehicle is a sign of a bad or worn-out CV joint, so this is one of the things to look for when inspecting for a bad CV joint. The grease in the CV joint can also spin out, coating everything in that part of the system, including the tyre, brake calliper, hub housing, and shock absorber.
A faulty CV joint causes axle failure, making your vehicle undrivable due to poor handling ability.
Always remember to inspect the boots of all CV joints when performing a CV joint inspection on an FWD vehicle or a small van. Inspect the boots for tears, cracks, damages, splits, or punctures. Replacing only your CV joints when your boots are worn out is pointless because worn-out boots will quickly damage your joints.
When and how should a worn-out CV joint be replaced?
- When and how should you do it If you have a bad or completely faulty CV joint, you should replace it right away. When it comes to replacing a faulty CV joint, you have a few options. You have the option of using recycled joints, replacing your entire CV axle with new or recycled CV joints, or purchasing new joints. The worn-out CV joint should be replaced. Many car mechanics recommend replacing your entire CV axle because it will remove any mild that has accumulated in your axle system and will help you spend less time repairing this problem.
- Furthermore, installing a new CV axle in your vehicle will help improve its performance, making driving more comfortable. Furthermore, you won't have to worry about axle system issues for a long time. The model of your vehicle determines the ease with which you can replace your CV joint. You may require the use of specialized tools to facilitate the process. This guide, on the other hand, will show you how to easily replace the CV joint in your vehicle:
- The first step is to put on your safety equipment, which includes gloves and a coverall. If you don't already have one, you should get one. It is not advisable to perform any repairs without first donning safety equipment. It is for your safety. Nobody wants to be hurt or bruised, so you should avoid it right now. Also, keep your toolbox nearby.
- To loosen the hub nuts on your wheels, use a wrench, but be careful not to overtighten them. You have about a quarter turn to turn around. Please do not use an impact wrench because hammering your hub nuts will cause them to wear out quickly. It can also destroy your vehicle's CV joint, even if it is still salvageable. To keep your vehicle from rolling, block the back and front of your tyres. You can also make use of the brakes. When removing a hub nut, some vehicle manufacturers recommend that it be replaced because it will no longer be able to retain torque. As a result, you should consult the repair manual for your vehicle.
- Lift your car high enough with your jack to allow your jack stands to be properly positioned. Check that your jack and jack stands are on solid ground. This ensures that your vehicle's weight is distributed evenly and that working beneath your vehicle is safe. Please inspect your jacks to ensure their safety before using them. After raising your vehicle, remove the lug or hub nuts to completely remove your tyres. A car lift is another option for lifting your vehicle. Make sure the transmission system is neutral. Close your car doors, turn off the engine, and check for any impediments. Place the adaptors and chock devices on the lift in the locations specified by the manufacturer. After that, you can begin lifting your vehicle.
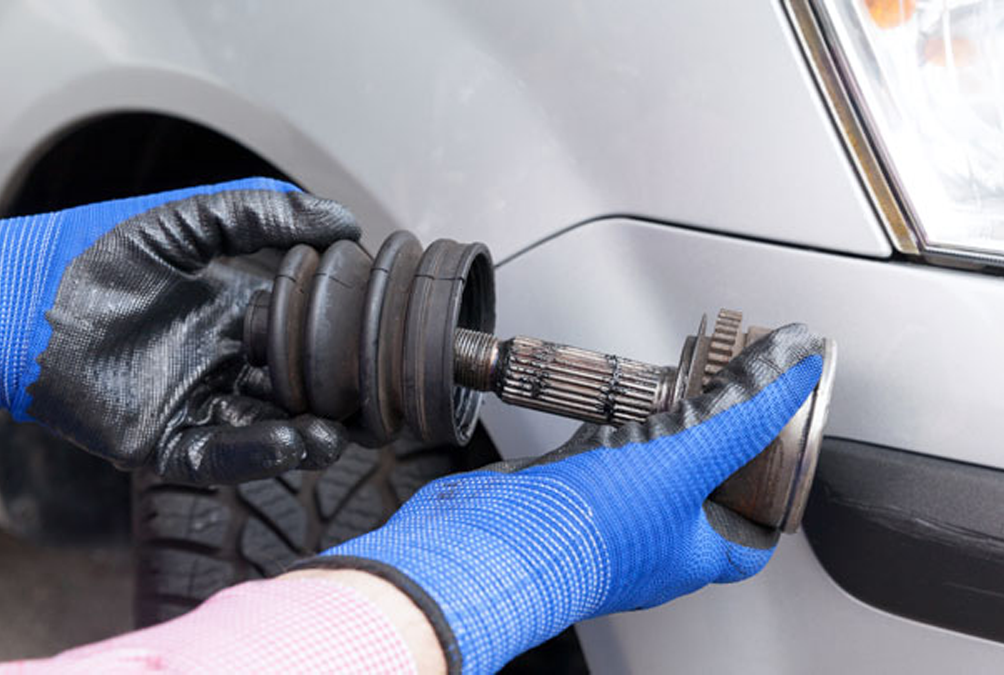
- You should now look at how your inner joint is connected to your transaxle. When the CV joint is connected to the stub shaft. After that, the inner CV joint must be removed. The stub shaft of the inner CV joint is held in place by the differential gear via a circlip on many vehicles. To successfully pull your joint outward, you may need to use a boot clamp tool. This will make it easier for you to tighten your CV boot clamp as well.
- If the inner joint is attached to the transaxle and the outer joint is contained within the stub shaft. Before you can pull your inner joint out of the transaxle, you must first remove the stub from your steering knuckle.
- To remove your outer CV joint from your hub housing, disconnect your tie rod ends and force the outer stub joint back through the hub housing. The brake calliper may also need to be removed.
- Once your knuckle is free to move, you can remove one end of the joint through your wheel hub. Please do not hit one end of the joint too hard so that the thread on the joint is not damaged.
- When one end of the CV joint is free, support it with any piece of rope until the entire joint is removed from the transaxle. You should not leave your CV joint hanging for it to not affect the hose.
- After you've completely removed your joint, you can easily replace it. Using a joint banding tool, you can easily install the new joint and reconnect your axle system. After coupling, adjust your wheels and lower your vehicle. Then, tighten the wheel lug nuts all the way.
Final Thoughts
It is critical to be aware of the symptoms of a bad CV joint so that you can recognize it when it occurs in your vehicle. It's also a good idea to check your vehicle's repair manual before starting any repairs because some vehicle manufacturers have repair specifications that must be followed.